
by Tony Zeoli | May 5, 2014 | Tutorials
From time to time, I dive in and help those who may be struggling with WordPress and post their questions to the New York Tech Meetup list, a popular email list-serve of technology industry workers in the NYC area, which I’ve been an active member of since 2008.
The question was, “I need a developer to help me with WordPress plugins.” Installing WordPress plugins isn’t that difficult when you’re working with a self-hosted version of WordPress. It’s similar to the Apple App marketplace. You search for what you want and it’s a one-click install. Simple. Here’s what this looks like.
From your installed WordPress, go to Plugins, then click “Add New.”
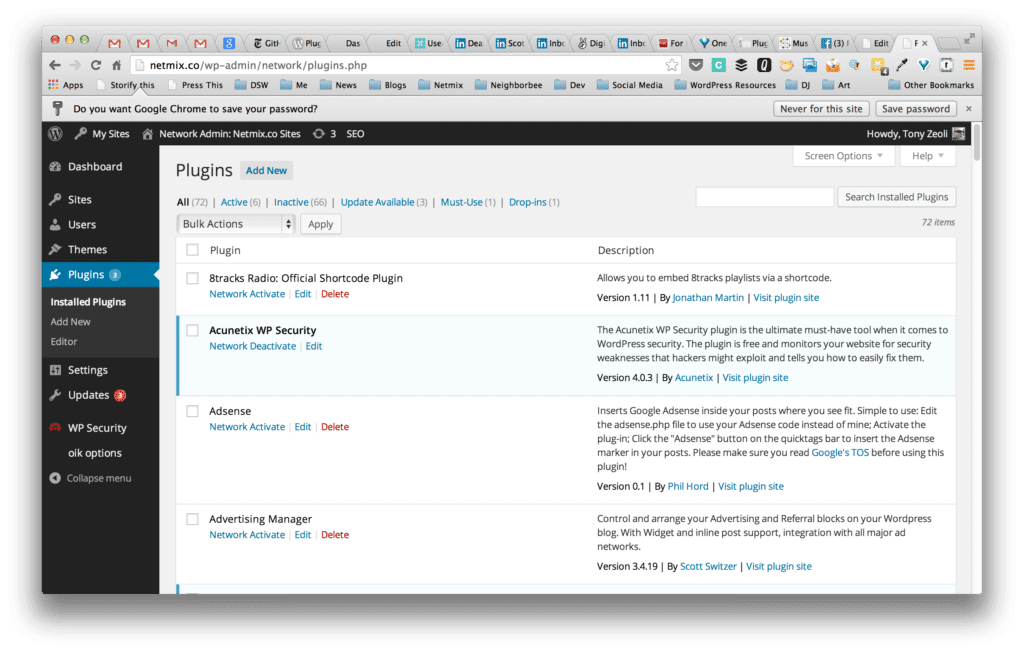
Plugin Screen
Next, type in some words to search for the plugin that you’re looking for.
Note: If you don’t know what you’re looking for, you may want to go to WordPress.org Plugins repository to search and review the plugin first. Then, go back to your admin, navigate to the Plugins > Add New, search for it again. Once you return the results, click the “Install” text link. Or, you can download the .zip file from the online repository. Navigate to Plugins > Add New. Then click the “Upload” text link. Once it uploads and unpacks on your server, click the “Install” text link to complete the installation.
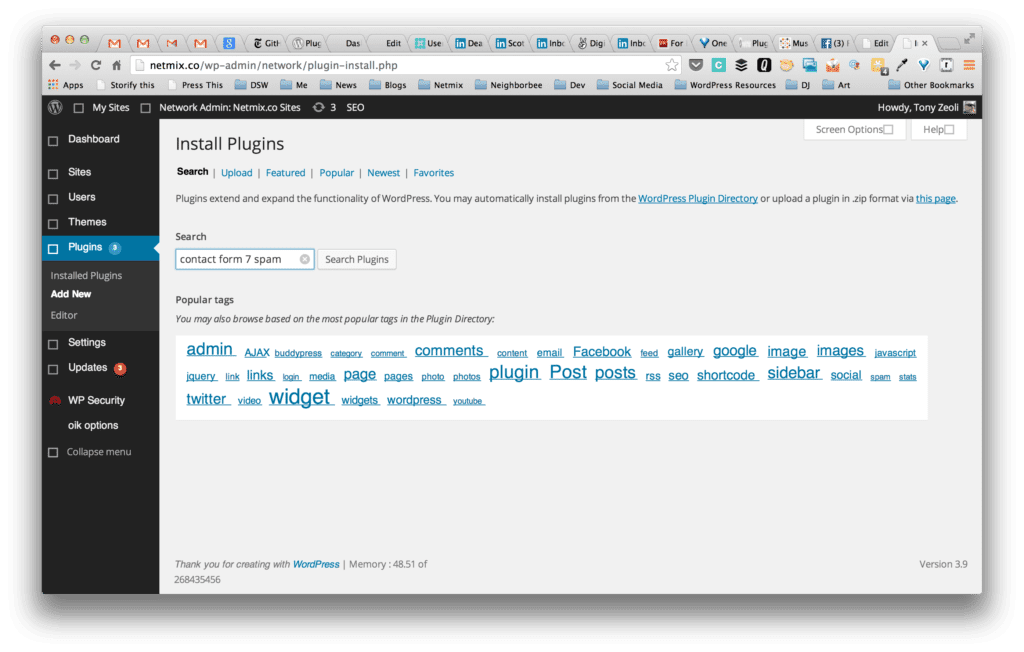
Search for WordPress Plugins
After clicking “Install,” your plugin will have installed itself. Again, very similar to installing apps on your iPhone or Android device. If the plugin you are looking for is already installed, the text link will indicate this. Once installed, click “Activate” (not shown) and it will make the plugin active and ready to use. On WordPress Network installs, you can click “Network Activate” and that will make your plugin available to every site in your network. There are times when you want to only make it available to a single site in a multi-site, so do not click “Network Activate.” Simply navigate to that specific site’s Plugins area and activate it only for that site in your network.
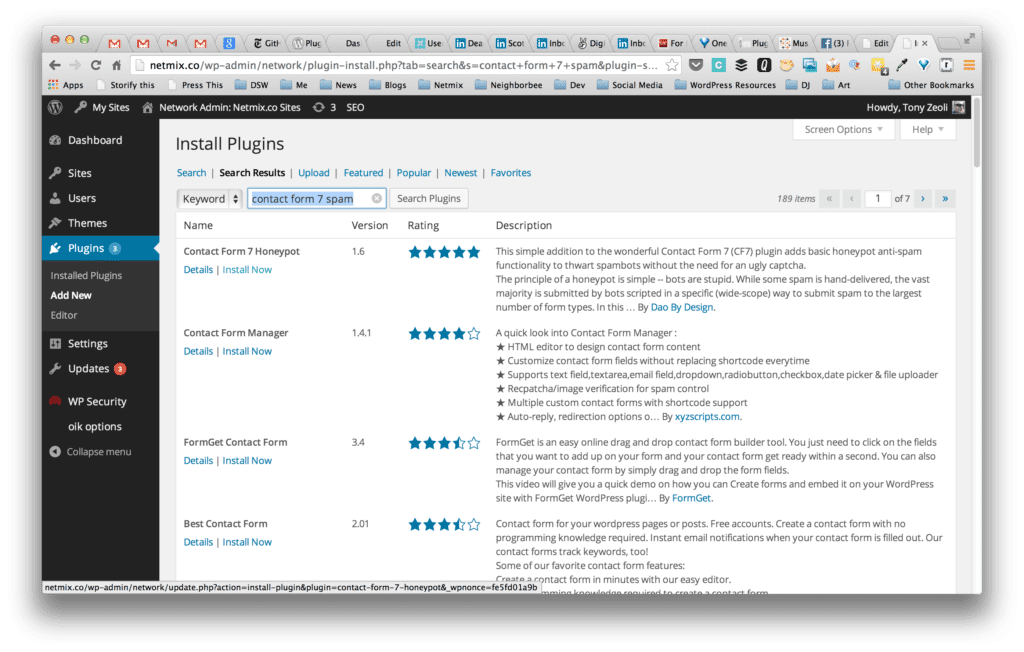
Search results for WordPress plugin
I installed a plugin, but I’m having a problem!
The problem many face when they can’t seem to install a plugin is when attempting to install a plugin to their WordPress.com hosted blog. WordPress.com is a closed, proprietary system. You cannot install external plugins from 3rd party developers. You can only use the tools the system provides. Yes, we do hear from others how easy WordPress is to use. It’s true. It is easy in many respects, but the subtle nuances are, at times, unclear. If you someone tells says, “sure, you can install any plugin you want.” That doesn’t mean you can install a plugin on WordPress.com. It generally means your hosted version of WordPress.
While it’s relatively easy to install a plugin, it’s important to assess what that plugin actually does. Issues that might arise. For example, does the plugin make constant requests to the database of my site, which can result in slowing my site down? Or, is the plugin sufficiently being supported by its developer? It’s hard to know the answers to these questions, but fortunately there are forums where you can ask questions before you decide to freely install a plugin.
There are times when, if a plugin is not developed correctly, it can conflict with another plugin other or your installed version of WordPress itself. In the past, you might have experienced what has come to be known as the “white screen of death.” This happens when you install a plugin and your website then generates a blank white screen. I rarely see this happen now, but if it does, you have to remove the plugin via FTP or by using command line instructions (if you’re experienced with command line tools) to see if that resolves the conflict.
The 3rd party plugin I’d been assisting this person with is called Big Blue Button. It’s a web conferencing system, that when plugged into WordPress expands its capabilities into an e-learning tool. This person also wanted a payment gateway for subscribers to pay for access to the conferencing system. After I few emails back and forth, I was able to determine he was trying to install plugins into WordPress.com and not the self-hosted version, open source version of the WordPress software you can download for free at WordPress.org.
It’s important to focus on the why. WordPress.com is powered by Automattic.com (with two tt’s at the end), the professional services arm of WordPress. The company was founded by WordPress co-creator, Matt Mullenweg, who forked an open source blogging sofware in 2004 to create the first version of WordPress as an open source blogging engine. Automattic also runs a variety of other WordPress specific services, like WordPress VIP hosting, Akismet (spam plugin), Intense Debate (commenting engine) and Vault Press (up-to-the-minute backups).
WordPress.com is generally for the person who wants to set up a simple blog. It’s just like going to Tumblr.com or Twitter.com. You sign up, inherit a templated user profile and you’re free to start blogging. There are a number of plugins pre-installed with WordPress.com and maybe a few others that are tested for the network and made available to all site owners. There are also a number of pre-approved free and paid themes available in a theme marketplace. WordPress.com also offers the ability to register a domain name. Your website will then resolve at a domain you purchased and not something like mysite.wordpress.com.
It’s a useful upgrade for those new to hosting your own website. Howeve, it may impact your site’s domain authority in a Google search. If you own “domain.com” and it then redirectrs to domain.wordpress.com, then Google is going to spider domain.wordpress.com and not necessarily associate your posts with your primary domain. In my limited research with one specific domain I’ve been working with, Bing seems to give more weight to a primary domain redirecting to a subdomain than Google, but I’m not sure why.
Let’s recap. Remember, what you cannot do at WordPress.com is install themes or plugins outside of their internal marketplace. Even ones you might find at WordPress.org, because WordPress.com is a closed, proprietary environment. To introduce themes and plugins into the system from third party developers is to possibly introduce problems that incur from malware or simply poor development practices.
Here’s a good example. For a client, we were working on installing a popular posts plugin to display the ten most popular posts on that blog in a sidebar widget. However, it was learned that the plugin checked the database hundreds of times a day to determine which posts are most popular. All of those database requests along with general requests for content can impact site speed. Taxing the database with constant, unnecessary requests slows down the performance of your site. Introduce a few of these types of these plugins into WordPress.com and is could potentially slow down the performance of the entire network of hundreds of thousands, if not millions of websites.
WordPress.com is a “multisite” environment, where one codebase and one set of plugins is introduced into the network. Anyone can then turn on a plugin for their blog instance that Automattic has vetted for quality and added to the library of available plugins. Therefore, we can’t introduce plugins that haven’t been approved by Autotmattic, even if we wanted to. Only the system administrators and developers at Automattic can vet plugins and themes and introduce them for everyone to use. They must pass strict tests and to ensure the installation of one plugin does not cause the entire network to crash.
How is WordPress.org different than WordPress.com?
WordPress.org is run by the WordPress Foundation, a completely separate but somewhat entertwined entity. Automattic provides funding to this non-profit arm, which manages the open source WordPress project. This is the same for Acquia, the corporate arm of Drupal that funds the Drupal open source project; Red Hat, which supports the Linux open source project; and, Mozilla which services Firefox. How these companies make money is providing support and resources through their for-profit entities to companies that employ free, open-source projects into the enterprise.
Today, you can freely install the latest version of WordPress software on in shared hosting environment through most hosting companies with a one-click install. You do not have to be a developer. You do not have to know how to code. You can simply sign up at Blue Host, Dream Host, 1and1 Internet, MediaTemple or use a WordPress specific host like WP Engine or Page.ly to get up and running with WordPress in minutes.
You get your own personalized instance of WordPress on a hosting service you manage, which usually has a low monthly cost to it. From around $12 to $30 depending on the company and the offering. While the WordPress download is free to install, the cost of hosting is not free. It’s similar to your monthly cable Internet or television bill.
Whereas hosting your own verison of WordPress with a hosting company has a monthly cost, WordPress.com is free, but you’re restricted with what you can do for a reason. Automattic makes money by selling ads and upgrades. Either way you slice it, you’re going to spend some money somewhere. Is anything in life truly free? There is an illusion of free, but realistically, there is always a cost somewhere you are going to incur.
Basic WordPress hosting and new WordPress managed hosting
With basic WordPress hosting, you’re solely responsible for keeping your WordPress installation current, which means you are responsible for clicking the upgrade link when WordPress says you have a new version to install. Before you upgrade, you should backup your WordPress yourself (plugins like VaultPress and BackUp Buddy will help with this). If the upgrade fails for some reason and breaks your site, you should be prepared to restore from your backup. And, you have to upgrade plugins just like you do your iPhone or Android apps when a new version becomes available. You also have learn a little about WordPress security. For example, redirecting your DNS through a service like CloudFlare. While it’s generally easy to do, if you’ve never done this before, it can be challenging for the lay person.
Yes, it’s your responsibility and not your hosting provider. unless you’ve signed up with a company like Media Temple’s new managed WordPress service, WP Engine’s WordPress managed WordPress service or Page.ly’s managed WordPress service. There are others now too, but we like WP Engine and MediaTemple the best so far. It’s more expensive, costing about $29 a month for your WordPress managed hosting, but it’s well worth it.
10-years ago, when WordPress came on the scene, many of these new services did not exist. It took a decade to develop the WordPress ecosystem into what it is today. Managed hosting is a new concept that recently appeared, because it solves a pain point for the novice who aren’t interested in the nuances of WordPress, but will pay a managed hosting service a little more a month to have these things done for them.
What you get is backups, support and security, so you don’t have to worry. On WP Engine, they have a list of blacklisted plugins they ask you to not install, because you would be introducing problems to their WordPress multisite network. While they are certainly more flexible than WordPress.com, they have good reason to ask you not to install any blacklisted plugins. If you do, they run a script that will uninstall it.
You can certainly choose not to go with managed hosting and work with MediaTemple’s Grid or Dedicated Virtual (DV) systems. That’s okay, but then you’re responsible for your WordPress instance – backups, security, etc.
If you’re still challenged with understanding the difference between WordPress.org and WordPress.com, understanding the plugin ecosystem or need advice about WordPress shared, dedicated virtual or managed hosting, feel free to contact us and we’ll be glad to help. You can also check Meetup.com and join a local WordPress Meetup Group in your area. Or, you can attend a WordCamp, which are 2 to 3-day local WordPress community-driven conferences, where there are beginner, intermediate and developer level tracks that are very educational and should help you get started or keep doing, depending on your level of experience.
by Tony Zeoli | Jan 15, 2014 | Tutorials, Updates
Here at Digital Strategy Works, we are always trying out new services to improve our own processes. In order to manage our work, we use the following software as a service tools. Many of these companies have partnered with each other on API integrations, so the tools sync with one another to share information.
- Basecamp for project management,
- JIRA for agile/scrum product development and project management of complex applications,
- Harvest for time tracking and invoicing,
- Xero for accounting,
- CollabSpot for CRM integration from Gmail with Highrise a CRM tool that also syncs with Basecamp,
- BugDigger for bug tracking,
- Google Apps for our company email, file management and shared document repo
- Github for version control
- Adobe EchoSign for sending documents for signatures from our clients
While all these services are great, we’ve been struggling with contracts and agreements. How to manage them, track changes and ultimately send them out for signature. I was looking at contractual.ly for organizing my DSW agreements and sending them out for signature.
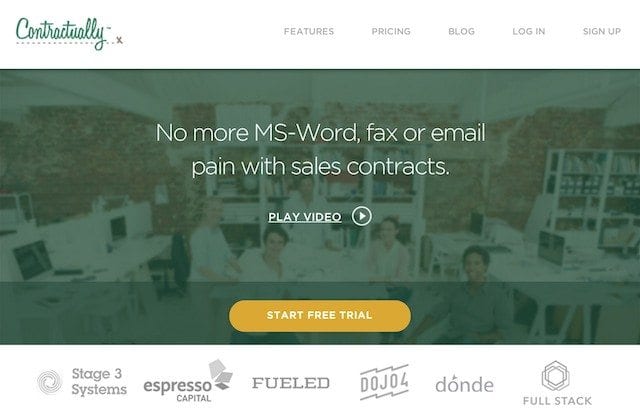
Contractual.ly Home Page
DSW partner and CTO, Michael McNeill, pointed out that I could integrate Adobe EchoSign with Google Docs installed through the Google Apps Marketplace, which could possible save us money. Contractual.ly pricing is $10 a month for one user and $30 a month for two users. It climbs quickly to $100 a month for 5 or more users. I don’t understand how you go from $10 for one user to $30 for two users, but let’s shelve that for now and get back to the task at hand.
EchoSign does have a freemium tier, which I’ve been using. You can sign up for free and send up to 5 documents out for signature per month. Using the freemium tier of EchoSign is certainly inexpensive. At this point, we’re not sending over 5 docs a month for signature, but soon we will be and that may end up costing us more and here is why.
EchoSign’s Pro plan is advertised at $14.95 per month if you pay up front for the year and $19.95 monthly – and, only for one user. At that level, you can store up to 500 documents. The next tier for 2 or more users starts at $29.95 per month on a monthly billing cycle or $19.95 per month if you pay the year up front. Without knowing how much we’re going to use the service, we’re opting for the freemium plan and could go to the $29.95 a month in a few months, if it makes sense.
At this price point, contractual.ly is competitive. With contractual.ly, you can pay $49 per year upfront for a single user or $30 a month for 2 users. I think I saw a coupon code out there for $5 off per month, as well. The difference between EchoSign and contractual.ly is that with EchoSign, you’re only sending out for signature and storing your docs in the cloud. With contractual.ly, you’re both storing your docs and are able to collaborate with your employees and partners or customers in the system. However, I’m not sure yet if by users they mean both your company and your clients, which would then increase the cost to $100 a month for 5 users if you had to include some of your clients as users, so they too can access the admin. That could get expensive down the road if you were paying for more users per month, but have already completed agreements and there’s no reason to keep those users in your system. I have to further investigate to see who is a “user.” For now, let’s look at the challenges of using Google Docs and EchoSign together.
The issue with Google Docs or any Word formatted agreement, is that when you do a search and replace inside the agreement, you’re bound to replace text that you didn’t want to replace. You then have to scan the document to make sure that the text is correct. Each time you change your template, you have to worry about what you may have changed inadvertently and with agreements, its very important to ensure their accuracy, as changing the spelling of one word inadvertently could nullify a clause in the agreement.
With contractual.ly, you insert fields and once you publish the document, you can then change the text in only those fields you’ve identified. The system allows you to place the same field multiple times throughout, that way when you enter your text, it writes once and reads everywhere.

Templating w/ Contractual.ly
Yes, I’m aware that there are probably macros for Word that can be used to change the text in certain locations of the document, but I don’t believe that translates to Google Docs. I checked and found only an update for macros in Google Spreadsheets. We’ll still have to use Search and Replace in Word to change, for example, the name of the client throughout the document.
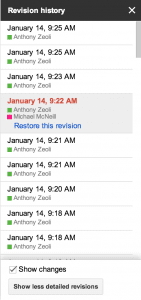
Google Docs Revision History
My partner also thought that using Google Docs would be good for collaboration – making changes and that sort of thing. The issue here is that when you share documents outside of your Google Apps account, there are times when clients cannot get into Gmail or they refuse to use Gmail or Google for privacy reasons. I’ve encountered the first scenario, where someone could not open the Google Docs link. I have also encountered the second. Not everyone want to use Google and some may not even have a Gmail account to store the document to their own Google Drive. That has been a minor problem so far, but could become more complex over time.
The questions is, is Google Docs the right tool for contract management and collaboration? Well, we’ll find out when I have to update an agreement and then resend the new version via EchoSign. In some ways, transparency may be lost or mistakes may be made, because someone may update the doc and not rename it as a new version in Google Drive. Yes, you can do a revision, but that doesn’t mean the title of the doc changes. I believe you have to do that yourself.
I found an issue with installing Adobe EchoSign’s Google App from the Google Apps Marketplace. When you attempt to install the app through your Google Docs account by CNTRL-Click the document name and then select Open With, then select Connect More Apps, it is not available in the Marketplace manager.
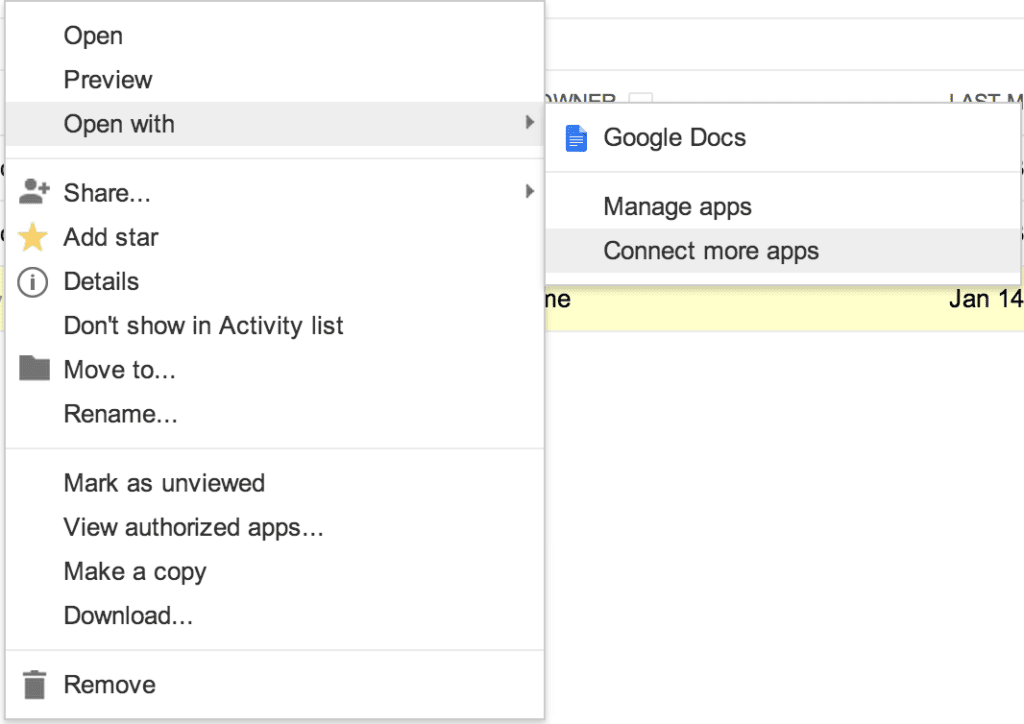
Connect More Apps from Gmail
The Marketplace manager will open. Do a quick search for Adobe or EchoSign and see the result shown below.
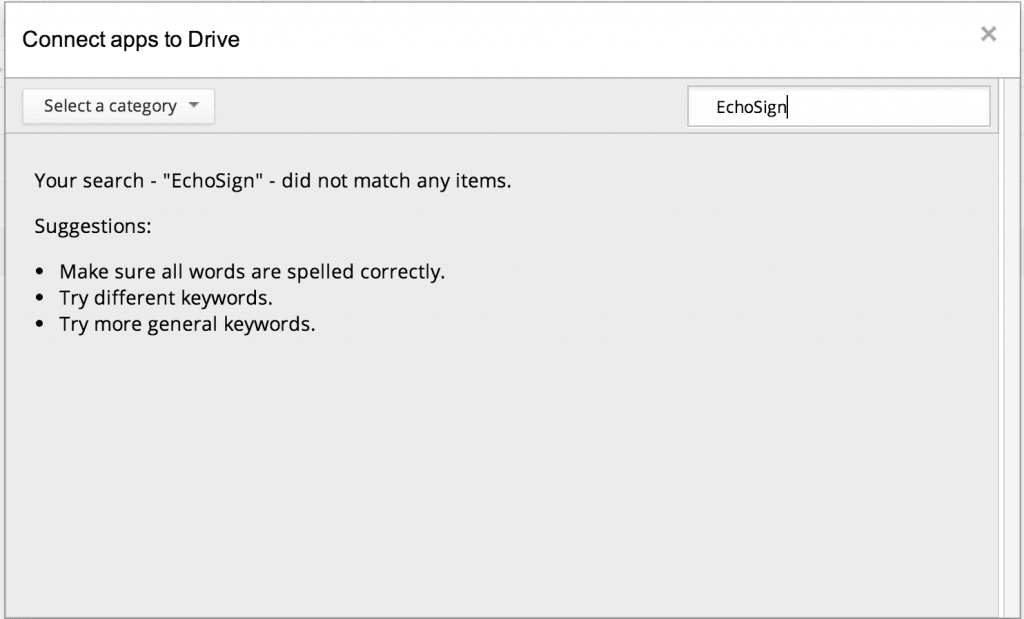
EchoSign search returns null
I found a workaround by clicking the new Gmail Apps tool that was recently added to the header of your Google products. It is the grid icon between my name (+Anthony) and the bell icon (as shown below).
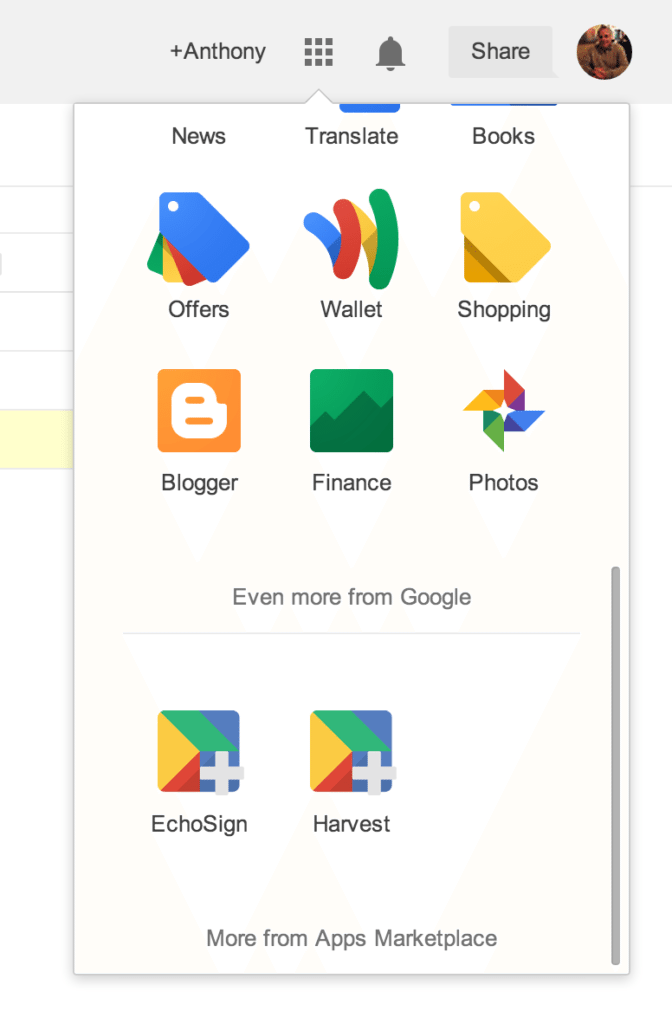
Google Apps Tool
As you can see, EchoSign is already installed. But to actually find it, you have to click on More from Apps Marketplace, where you can search for it and then click, “Add It Now” as shown below.
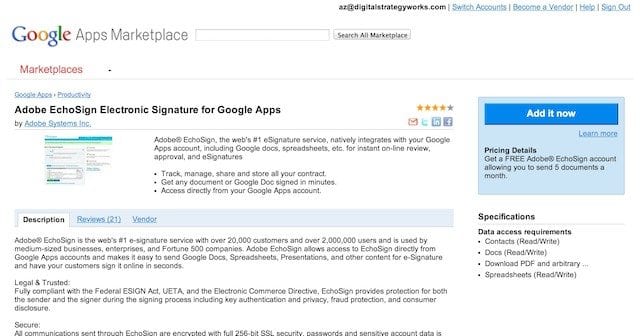
EchoSign for Google Apps
Once the App is installed, you will be shown a notification that the installation is ready (not shown here), but to complete the connection, you will have to sign into your EchoSign account. If you don’t have one, then the link provided in the notification will take you to the Adobe EchoSign signup page.
As you have seen from the prior images, EchoSign app was added to my Google Apps manager, but there’s not much you can do with it here after installation. What EchoSign really does is sync with Google Docs. It then can show you what documents are ready in your Google Docs to attach and send for electronic signature.

EchoSign Google Drive Viewer
I did notice another cool feature of Adobe EchoSign: the ability to send docs for signature from Evernote, DropBox and Box.com. You can find those services by clicking on the “More” link to the right of the word, “Google Drive.” I haven’t used it yet, but it’s there if you need it. The issue here is always going to be, can you do document collaboration and management with the connecting services and do it well? Maybe these services will provide tools for document management as Google does with it’s Google Drive and Google Docs.

Other services view in Adobe EchoSign
So, is it worth $10 a month for one user at contractual.ly and pointing my clients there to review, comment on and sign docs? I think the field generator is excellent and will prevent a lot of mistakes. It would work much better than Find and Replace in Google Docs or Word, and it saves time and effort in setting up a macro, which doesn’t look as easy as they make it out to be. For now, we’ll try out the EchoSign plus Google Docs integration and see how it works for DSW and our clients. If we have too many formatting issues or clients have trouble accessing the Google Docs link, I’m going to head back over to contractual.ly and try it out.
Here’s a video explaining the Adobe EchoSign experience – although without the link to Google Docs.
by Tony Zeoli | Jul 30, 2010 | BuddyPress, Tutorials, Updates
When Ning CEO, Jason Rosenthal, announced they would be ending their free service, a lot of folks operating Ning networks have been looking for a low-cost alternative. While not 100% free, migrating your Ning network to BuddyPress is certainly an option. When we say it’s not “free,” that is because you will still have to pay for shared hosting with a company like MediaTemple, which charges $20 a month for their Grid-Service (GS) package. And, if you’re not familiar how to install WordPress on a server, then install and configure BuddyPress on top of WordPress, you may have to hire a company like Digital Strategy Works to help get you set up.
A Ning to Buddypress migration is not that easy, but it’s not that hard either. The issues you will face will mainly have to do with your host provider and whether they offer php version 5 and how much RAM they allocate to php to run the php scripts necessary to make WordPress, BuddyPress, and the Ning to BuddyPress importer work properly in tandem. Boone Gorges, the Lead Developer at CUNY Academic Commons, has developed a sophisticated WordPress to BuddyPress importer, available for download from his blog.
To extract your content from Ning, you’ll need the Ning Network Archiver. Ning created a tool to help network owners download all their content from, including users, blogs, forums, and discussions. It will also download your music and videos as well. The Ning Network Archiver runs on the Adobe Flex and Air platforms, so you’ll be prompted to install Adobe Air before you install the exporter tool. It needs Adobe Air to run on your desktop.

- Ning Network Archiver Tool
The Ning Network Archiver exports your text content in JSON format. JSON is a “lightweight data interchange format” based on Javascript. In addition to backing up your text content along with all posts and comments, the exporter will set up and link to directories for all your photo, video, and audio content as well. This presents a bit of a problem if your host does not provide you with enough php memory to run the Ning to BuddyPress importer tool, but we’ll get to that later.
Next, you’ll need to set up an account with a web hosting company. There are thousands of web hosting companies out there, so who do you choose. Many people who have set up Ning networks did so because they are NOT system administrators–the folks deploy web sites on servers and manager their health and well being. How do you choose?
You’ll probably want to find a WordPress friendly host. That’s not easy, because you can’t just Google “WordPress Friendly Host” and come up with a list true WordPress friendly providers. People in the WordPress community know who to use. We generally depend of MediaTemple, Bluehost, Dreamhost, and LaughingSquid. WordPress actually recommends these four partners on their web site. Digital Strategy Works generally uses and recommends MediaTemple. We like to keep everything with one provider, but we don’t begrudge you for checking out the other three we’ve listed here. They are all fine hosts and you should be able to do what you need to do with all four.
Next, you’ll want to install WordPress. Some of these hosts most likely offer a “one-click” install from the control panel provided once you set up your account. If you know how to FTP files to the server and are familiar with setting up a mySql database, you can manually set up WordPress yourself in under 5-minutes. We do it every day, so we can attest that it is really that fast.
Now for the PHP stuff….
MediaTemple is currently running php 5 on their hosting packages. WordPress runs on php 5 and has announced that it will no longer support php 4 in Q1 2011. While MediaTemple has switched to php 5, services like 1and1, HostGator, or other providers may still be running php 4. We know this to be true for 1and1 Internet, but we’re not sure about many of the others. 1and1 has announced they will switch to php 5 end of Q3 2010. In the meantime, there is a way for you to force 1and1 to upgrade your server to use php 5.
How do you know if you’re running php 4 or php 5? Easy. You can add a file to your root folder. Let’s call this file “info.php” Use a text editor or a WYSIWYG HTML editor like BBEdit (Mac) or CoffeeCup (PC) to add this text to the file:
<?php
phpinfo();
?>
Upload the file to your web server root, so the path to the file looks like this: “https://www.foo.com/info.php.” Visit the link and it will return a page that will tell you what version of php you are running, how much memory is allocated to php and other information. The page shown here is a partial view of the full page that is returned.

- PHP 5 Info Page
When you install WordPress, you should see a file call .htaccess in your WordPress root folder. You can turn on php 5 on 1and1 Internet by inserting the following two lines to your .htaccess file.
AddType x-mapp-php5 .php
 AddHandler x-mapp-php5 .php
Check your info.php page again to make sure that your server is now running php 5.
Worpress 3.1 (current version) will not run on php 4, so you must have php 5 enabled to install. Once you get WordPress up and running, you’ll want to then download and install BuddyPress. What is BuddyPress? It’s a “plug-in” that extends the WordPress content management system by adding social networking features, much like how Ning currently works. It adds a social-media “layer” to WordPress. BuddyPress is not a full-on installation of WordPress itself. It’s an enhancement that works in tandem with WordPress.
After you get BuddyPress installed and activated from the Plug-Ins panel in your WordPress admin (don’t forget to activate!). you’ll notice your WordPress admin has a new “BuddyPress” panel near the top of the page in the left sidebar menu. You’ll want to click on and run the “Forum Setup” link to install BBPress, which is another WordPress plug-in that adds a discussion board to your WordPress installation. If you were running WordPress 3.1 without BBPress, you would have to install BBPress separately and then use it’s associated plug-in to connect BBPress to WordPress, so that it can hook into your WordPress user tables.
On some hosts, you’ll find that you will get a FATAL ERROR message. It says that the server tried to allocate a set amount of RAM to php, but the server needs more RAM to run the script. This is a common issue when it comes to running processor intensive scripts that complete complex functions. Most host providers allocate 30 MB to 100 MB of RAM on the server to run php scripts. I know that 1and1 allocates only 30MB while MediaTemple allows for 100MB. 1and1’s package may be cheaper than MediaTemple, but with MediaTemple, you get the flexibility to scale to 100MB out of the gate. Spending the extra $10 a month at MediaTemple is well worth the hassle.
It’s not advertised, but you can force 1and1’s settings to increase the php memory limit in two ways. The first way is by adding a line of code to your wp-config.php file, which sits in your root Wordrpress directory after install. This is the same file as your mysql settings, so you’re going to be familiar with it, because you will have already accessed it in your 5-minute install.
Use the following code to assign more Memory to WordPress:
Increase PHP Memory to 64MB
define('WP_MEMORY_LIMIT', '64M');Increase PHP Memory to 96MB
define('WP_MEMORY_LIMIT', '96M');You can increase the settings to 128 or even 256, but 96M should be good enough to do what you want to do.
If you are still having issues with RAM, it could be both a php memory limit issue as well as the server timing out when trying to run scripts. A web server may need more than the maximum execution time to run a script. To circumvent the host’s memory settings, you may create a text file with the “.ini” extension and call it “php.ini”.
Add this text to you file:
;;;;;;;;;;;;;;;;;;;
 ; Resource Limits ;
 ;;;;;;;;;;;;;;;;;;;

max_execution_time = 60     ; Maximum execution time of each script,  in seconds
max_input_time = 60	; Maximum amount of time each script may spend  parsing request data
memory_limit = 256M      ; Maximum amount of memory a script may consume
As you can see, this sets the max execution time for php scripts to 60 seconds, which is more than enough time to run a function.
Drop this file in your root directory of your host account, and it should override your shared memory limit settings. We’ve read that under some circumstances, you should also add this file to any folder where you need to run a php script. An example would be “wp-admin.”
Now that you’ve taken these steps, you should be able to run the Ning to BuddyPress Importer. You should turn off all other plug-ins before running the tool, except for “BuddyPress,” of course. Once you run the application, follow the instructions. The plug-in will at first attempt to bring all of your users in from the associated JSON file. The execution time may max out after importing a few hundred users. Follow the page instructions to simply refresh the page, and you’ll see that it will start dropping in the next set of users. You’ll be able to tell because each user is numbered. If it times out at, for example, 150 users, then just refresh the page and it will start bringing in 151 through the end of the next set.
Once the user tables complete, the system will show you all users that have been added. You may see an error related to each user that is calling for an avatar associated with that user. If there is no avatar available, while the user is still created in BuddyPress, the system will assign the user a temporary avatar.
The next step is blog content. Once you have completed the user tables, the system will start importing posts and comments. The system will import these, but also may show an error for a piece of content that might be missing. We noticed this and ignored it for now. The plug-in does not tell you exactly where to find what it’s not pulling in, so you’re on your own to figure it out. It’s not a big deal though, because if it didn’t exist in Ning, then it shouldn’t matter. Someone may come here and post something different about this process, and we welcome those comments and insight.
The final step is to bring in the Discussion boards with all their comments and associated media. Truth be told, this is where we are stuck right now. Despite changing all the memory settings and playing with the configuration, the Ning to BuddyPress importer is telling us it needs more memory to complete the function. We’re going to try to turn off plug-ins in other WordPress installations on the same host account and see if that works, but at the time of this post, we’re not sure. We noticed our client’s Discussion content is over 14MB, and this could be the reason we’re running out of memory. Will post an update once we figure it out. We would think that if we didn’t have such a large Discussion folder, we would be able to import without a problem. However, that’s not the case, so it’s back to the testing ground.
We hope this quick tutorial based on our findings helps you. Remember, the Ning to BuddyPress importer is a tool that Boone Gorges created in his spare time. It’s pretty awesome, but could still be a bit tricky. Once people migrate off of Ning and onto BuddyPress, the tool will be rendered moot. But, for now, it’s a necessity for sure.


